How to Plant Astilbe: Step-by-Step Planting Instructions
Your bare root astilbe arrives packed in moist material, roots intact but lacking the visual appeal of container plants. The difference between success and failure happens in the first 24 hours after arrival. Bare roots that dry out lose their ability to establish strong root systems, leading to stunted growth and poor flowering[1]. Keep those roots constantly moist from the moment you unpack them until they settle into your garden soil.
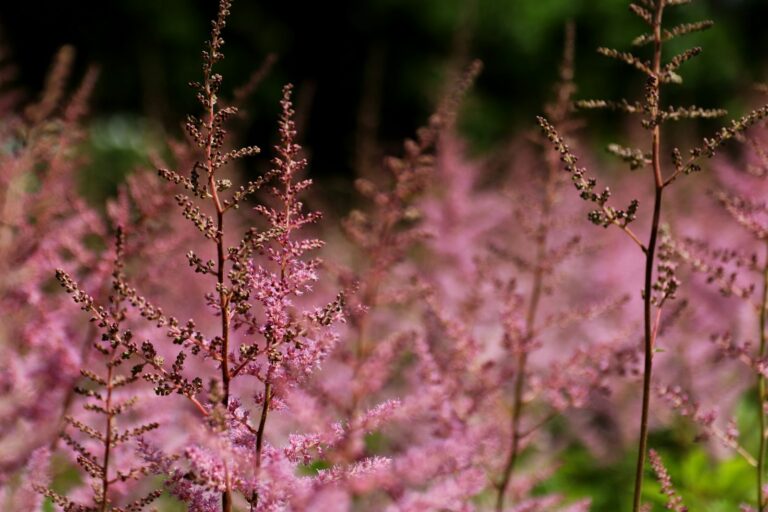
Astilbe takes over shady garden areas that are poorly planted by other flowering perennials. These shady plants yield feathery plumes in white to deep burgundy and flower during late spring through late summer depending upon how many varieties of it grow. The secret to success is planting the right way, controlling the moisture, and knowing your growing situation.
When to Plant Astilbe
The spacing of planting helps to control how much time your astilbe has to set up and establishes. Plant in spring after the danger of serious winter frost has cleared or in the early to medium autumn months without starting from summer[2]. Summer temperatures when paired with astilbe and the moisture needs it gives additional stress to establishment. Spring planting enables roots to grow before summer heat returns, while fall planting allows roots to develop prior to winter dormancy[2].
💡For complete growing guidance, explore our comprehensive astilbe guide, or review our detailed timing recommendations for your specific climate zone.
Choosing the Right Location
Choose to plant in a place with partial shade to full shade. Astilbe prefers partial shade yet tolerates filtered sun in the northern regions[7]. Full sun locations also need constant moisture to avoid scorching and wilting of leaves[4]. Southern gardeners should select areas with afternoon shade to shield plants from extreme heat[7]. They don’t want to plant under trees with heavy, shallow rooting roots that aggressively compete for moisture.
Astilbe thrives where other flowering perennials struggle—making it the perfect solution for challenging shade gardens.
Soil Preparation and Testing
Preparing the soil will affect long-term plant health. Astilbe thrives in moist well-drained soil with high organic matter concentration and slightly acidic pH of 6.0[3]. Make a hole and fill it with water to test what you have on your soil drainage. If water is available after 5 to 6 hours, drainage can be improved with ample amounts of peat moss, perlite, and coarse sand[2]. Root rot and plant death are caused by clay soils and sites with poor drainage[4].
💡Ensure long-term success by understanding complete soil preparation before planting, including amendments, pH levels, and drainage solutions.
Inspecting and Preparing Bare Roots
Check your bare roots when it comes time to visit. Take them out of packaging and gently examine the root system. Clean, sharp pruners to scrape all broken or mushy roots off. Healthy roots are flexible and firm, ranging from cream to light brown. If the roots look dry, soak them in room temperature water for 1 to 2 hours before planting, but do not leave them submerged overnight.
Digging the Planting Hole
Dig a hole to plant the entire root without cramping. The diameter of the hole should be equal to (double) the area of the root mass and be deep enough that the crown lies at or just below the surface of the soil[1]. To stimulate downward roots, allow the soil to free up a depth of about 10 to 12 inches[6]. In place of nutrient, mix the soil removed from the ground up with compost or good organic matter in a ratio 1 part amendment to 2 parts native soil.
Planting Depth and Positioning
Insert the astilbe root crown into the hole and fan the roots a little and point down. The eyes or growing points should be less than 1 inch off the soil level and less than 1 inch under dirt[2]. Overplanting too deep rot the crown, too shallow planting will be prone to drying out. Position the planting at least so the crown may stand even with or below the dirt to level.
Half-fill your hole with your amended mix of soil and press gently to cleanse out any air pockets. Cover with water to make sure the soil settles around roots, fill the hole. Continue to press down and get your soil down firmly but not compact it too thick. The completed soil level will be consistent with the grade of the outside and the crown will reside just below the grass.
Spacing Requirements for Optimal Growth
Arrange plants according to their mature size and your design intent. A lot of astilbe varieties need a distance of 18 to 24 inches. Dwarf varieties may be planted 12–16 inches apart, larger varieties 24–30 inches spacing[7]. If placed closer to be able to display with a fuller display quicker, though needs to be divided as soon as possible[2] usually 3–4 years[2].
| Plant Type | Spacing Distance | Division Frequency |
|---|---|---|
| Dwarf varieties | 12-16 inches | Every 3-4 years |
| Standard varieties | 18-24 inches | Every 3-4 years |
| Large varieties | 24-30 inches | Every 3-4 years |
💡Learn how spacing integrates with design in our spacing and placement guide, and discover options for growing astilbe in containers when ground space is limited.
Initial Watering After Planting
Water directly after planting with a slow, deep soaking which reaches to the end of the root zone. The soil should be thoroughly watered until it stays moist. Puddles not put the rainwater into those two holes to remain for a long time. This first watering centers the earth around roots and removes a bunch of holes – these are tiny and dry air pockets that will kill off any dry roots.
Mulching for Moisture Retention
When this happens, a 2 to 3-inch layer of organic mulch is added to the top of newly planted astilbe. Do not let it come down 2 to 3 inches on top of the crown[3]. Shredded bark, compost, or leaf mold all retain soil moisture effectively as it suppresses competition from weeds. Mulch cools the soil from hot or cold seasons and contributes organic matter when it decomposes.
💡Explore advanced mulching techniques for year-round moisture retention and soil temperature moderation.
Establishment Care: Watering Schedule
Keep soil moisture even with all the establishment activity. If not, if it doesn’t rain at least 1 inch for you 1 inch of moisture with water at depth once a week too[3]. Deep watering motivates root roots to grow down not into earth but to be deep, and to go far down. Measure the soil moisture by dipping your finger 2 to 3 inches into a hole in the soil a few inches next to the plant. Keep your finger on the ground close to your plant till it becomes moist. If you get a feeling that it feels dry at that distance, water well.
💡Master all aspects of moisture management with our comprehensive watering requirements guide covering frequency, depth, and seasonal adjustments.
Deep watering once weekly encourages downward root growth rather than shallow, vulnerable root systems.
Monitoring for Establishment Stress
Watch foliage for evidence of establishment stress. Ash browning of the leaf surfaces is seen as lack of moisture[5]. Wilting, yellowing leaves are signs of overwatering or poor drainage. Align your watering schedule with the weather, rainfall and variety of soil. Sandy drains through quickly and it is better to water more often, while clay soils soak in moisture for a longer time.
First Season Expectations
Newly grown astilbe requires time to set up before flowering to its peak. Container-grown plants may flower in their first season with some flower growth, but bare root plants usually spend energy building roots in year one[2]. Try to expect full flowering performance after the 2nd growing season after planting.
Protecting Young Plants from Temperature Extremes
During a young plant’s first growing season, protect this is when you have to keep up with temperature extremes. In hot climates, afternoon shade becomes crucial in hot climates to avoid heat stress[4]. In cold places, when conditions deteriorate. Apply additional mulch after the ground freezes after frost heaving to prevent frost-induced heaving that might drive roots out of the ground if wet, in order for your roots to grow out.
Root Development Timeline
Root growth starts very soon after the planting. In the warmer climates, top sprouts develop in a few days after the planting in the spring[2]. In cool conditions, they sprout in spring after fall cover. This period of early growth is essential to building the capacity for plant growth and flowering success.
First Growing Season Maintenance
Astilbe grows the best with good watering for the first season. Water weekly during dry season, keep the mulches shallow, keep an eye out for pests & disease symptoms. Japanese beetle(s) are capable of eating foliage, however deer and rabbits rarely eat astilbe[5]. Rapidly treat pest issues to avoid damage that stresses small plants.
Managing Crown Position as Plants Mature
As the plants mature and the roots become larger, the crown may go above soil level above 2 cm below the tip of the root. Gently insert the crown back into the earth, and build soil to attach to the base, if needed[7]. Use composting top dress each spring to keep soil organic matter and deliver slow-release nutrients.
Ongoing Foliage and Flower Care
Even if flowers are gone[2], your astilbe will continue providing attractive foliage throughout the growing season. The dried flower plumes also add winter interest provided they remain standing and/or if planted they can be trimmed for dried out. In the late winter period when new annual plants are not yet blooming, remove the previous year’s leaves to the ground to grow for spring regrowth.
Long-Term Success and Division
Great growing forms the key to years of dependable colour in sheltered garden space. Astilbe prefers shade over most flowering perennials and leaves longer period of bloom by way of choosing diverse flowers[4]. If you pay attention to the requirements of moisture during establishment and selected sites properly, your astilbe will grow and multiply (and will need to be divided every 3 to 4 years to maintain vigor), you’ll be a star of the crop to plant out in the garden[3].
💡When plants become crowded, use our dividing astilbe guide to rejuvenate clumps, or learn transplanting techniques for moving established plants.
Key Sources:
[1] Astilbe Bare Root Planting Instructions | Gardening Know How
[2] Astilbe Planting & Growing Guide | Easy To Grow Bulbs
[3] How to Grow Astilbe | American Meadows
[4] Growing Astilbe in Iowa | Iowa State Extension
[5] How to Grow and Care for Astilbe | Clemson Extension
[6] Growing Guide: How to Grow Astilbe | Dutch Grown
[7] Growing Astilbe | Garden Design
[8] Astilbe x arendsii | NC State Extension
Lily Morgan is a home gardener. She grows houseplants and designs small-space gardens. She shares what she learns from experience. Lily offers simple, practical tips for plant lovers. Her goal is to help others garden with confidence. She wants to help them grow, one leaf at a time.