Astilbe Soil pH: Testing, Adjusting & Maintaining Acidity
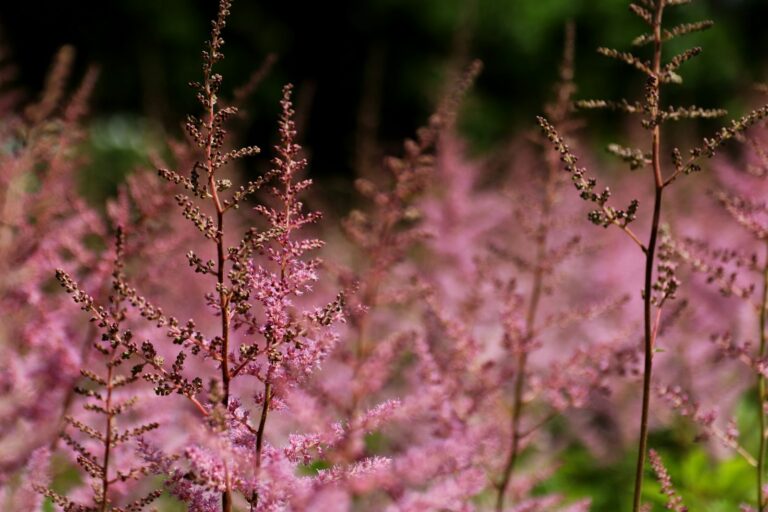
Your astilbe produces sparse blooms while neighbors display abundant flower plumes in the same growing season. The difference traces back to soil pH affecting nutrient availability at the root level. Astilbe prefers acidic soil with pH in the high 5’s or low 6’s[1]. Managing this narrow range transforms struggling plants into vigorous performers.
Understanding Astilbe’s Soil pH Requirements
Astilbe requires wet, well drained, slightly acidic pH of 6.0[2] in the soil. Plants grown outside this range show diminished flowering and nutrient deficiencies. Almost all garden soils in North America are slightly acidic 6.0 to 7.0[4], depending on rainfall, parent rock materials and gardening practices. Testing your soil determines when changes will need to be made before problems arise.
Soil pH stands for the level of hydrogen atoms in a solution and can be divided into 0 and 14[7]. Values lower than 7 signify acidity and values higher than 7 indicate alkaline conditions. The scale is calculated in a logarithmic rather than linear manner. Soil of pH 5.5 has a ten-fold higher amount of acidity than soil of pH 6.5 and a one hundredfold higher amount than soil at pH 7.5[7]. Because of this exponential relationship, minute pH changes must be computed using appropriate quantities of amendment.
The logarithmic pH scale means doubling sulfur or lime will not double the pH change.
Astilbe plants live in mild acidic soils from about 6.0. In the high end of this pH range, it’s quite likely iron and other micronutrients will not be available for the plant’s roots. This condition leads to yellowing of tissue between leaf veins, a symptom often mistaken with nitrogen deficiency[6]. The iron is still part of the soil, but as the forms are locked up and they can no longer be taken up by plants. pH decreases and the nutrients are put back into available forms.
Testing Soil pH for Astilbe
Soil pH testing helps to verify that amendments are adequate before introducing amendments. Three testing methods present the best accuracy and lowest overall cost:
- Home test kits: pH strips range from $7 to $25 and give reasonably safe results for gardeners[4]
- Professional laboratory assessment: Carried out through university extension offices, provides the most accurate measurements and detailed nutrient reports
- DIY vinegar and baking soda method: Provides a quick indication but fails in measuring specific pH values
How to Use pH Test Strips
When applying the pH strip method, soil samples are taken four to six inches below the topmost surface using a hand trowel[4]. Use blended samples from distinct areas of the planting site rather than one location. Mix half a cup of soil with an equal amount of distilled water to create a slurry. Stir vigorously and allow the mixture to sit for thirty minutes. Pour the sample through a coffee filter into a clean cup. Dip the test strip in the filtered liquid as per timing of package. Compare the colour with the manufacturer’s chart to find out the pH.
The soil testing process is most useful when done in fall to anticipate the next planting[4]. The timing gives multiple months to balance pH prior to planting in spring. Test when doing new garden beds or growing plants with particular pH needs. It is only every few years to retest as amendments degrade and soil is slowly returned to its natural condition.
Lowering Soil pH with Amendments
A soil test aimed at determining present soil pH initiates the adjustment[7]. In soils with pH less than 7.5, sulfur-based amendments can effectively reduce pH. Materials such as free calcium carbonate or marl are present in soils above pH 7.5 and resist acidification efforts[6]. In such elevated pH conditions, we are far more comfortable having plants adapted to an alkaline climate than using massive changes in pH.
The reduction of soil pH is best achieved by adding elemental sulfur, aluminum sulfate or sulfuric acid[6]. The decision comes down to how fast you demand changes in pH and the size of the plants undergoing treatment. Sulfuric acid is fast acting but pose dangerous health risks for home gardeners. Aluminum sulfate and elemental sulfur can be safely applied to home-based sites with well-handled tools.
Elemental Sulfur: The Safe Choice
Elemental sulfur provides the least hazardous yet most economical way for soil pH-reduction[7]. Biological and chemical conversion takes place during this amendment period and takes three to six months of warm soil temperatures. As pH drops, soil bacteria must convert elemental sulfur into sulfuric acid first. Elemental sulfur has a slow rate of reaction and is an excellent candidate for pre-planting amendments when appropriate time is sufficient for incorporation.
Aluminum Sulfate: The Fast-Acting Option
But there is a quicker dissolving of aluminum sulfate than with elemental sulfur, and so it only completes a chemical reaction[6]. pH changes occur in just days or weeks, not months. This speed advantage is advantageous for existing plantings, whose waiting lists maintain plant stresses. It takes more pounds to add, per application, than its elemental form for the same rate of pH change.
Calculating Application Rates
There are three basic parameters that affect the rate of sulfur application: the current pH measured by soil tests, the target pH for astilbe growth, and soil texture[7]. Sandy loam soils need much less amendment than clay to produce exactly the same pH change.
| Soil Type | Sulfur Needed (pH 7.0 to 6.0) | Application Depth |
|---|---|---|
| Sandy Loam | 8 pounds per 1,000 sq ft | 6 inches |
| Loam | 15 pounds per 1,000 sq ft | 6 inches |
| Clay Loam | 18 pounds per 1,000 sq ft | 6 inches |
For instance, reducing pH from 7.0 to 6.0 requires eight pounds of sulfur per one thousand square feet in sandy loam and eighteen pounds in clay loam[7]. The rates have been applied at six inches depth.
For most medium and fine-textured soils use typically four to six pounds of aluminum sulfate per plant to reduce pH by approximately one unit[6]. If, instead, elemental sulfur is being applied, reduce the recommended total amount by one-sixth[6]. A pound of aluminum sulfate or elemental sulfur comes to about two cups, approximately.
Too much aluminum and iron can harm plants—never exceed 50 pounds per 1,000 square feet.
Application Methods and Timing
Prior to planting sensitive landscape ornamentals, reducing soil pH is preferable over pH adjustment after the establishment of a plant[6]. Avoid root burns from concentrated materials in amendments, which will cause root burn, planting should be postponed for a month or so after applying amendments. This delay enables the beginning of reactions to take place and soil amendments to spread around.
Top-Dress Applications for Established Plants
Top-dress applications prevent root disturbance but slow down for plants existing in bed, preventing root disturbance or soil formation. Restrict each application, according to average landscape plant of about one pound of aluminum sulfate or one-sixth the amount of elemental sulfur[6]. Spread out the material with a light spread of it softly and add the material to the soil surface or water for a light addition. Apply it by the end of one month at a time in the same application until the recommended amount of fertilizer is added together with additional 5 milliliters as indicated in the recommendations on one leaf each month. After all the treatments, check the pH of the soil around three months after each to see if more is required.
Best Practices for Incorporation
The easiest way to change soil pH may be by amendments prior to planting. For example, amendments used to alter pH may be implemented during spring or autumn when soil temperatures are at least 55°F. Lime and sulfur do not dissolve in water and are mechanically inserted, for example using tillers, shovels, or disks to 6 to 8 inches depths[7]. When your plants have developed on the ground, correcting them without disturbing roots becomes virtually impossible. In addition, modifying soil below six to eight inches is impractical in most gardening activities.
Soil pH does not change overnight, but rather it is gradual and can take weeks or months[7]. Because we don’t change soil pH overnight, a real change only takes weeks or months and, when making major changes before planting perennial crops, amend soil and wait six months to re-confirm pH before planting perennial crops. This inspection verifies that the target value has been achieved. If measurements still fall beyond desired levels, further amendments are required prior to planting.
Too much aluminum and iron can harm plants, therefore, aluminum sulfate is not to be added at levels higher than fifty pounds per one thousand square feet[6]. Elemental sulfur has no toxicity, but that depends on time for biological conversion. Apply no more than five to ten pounds of sulfur per one thousand square feet per application[5]. Decompose larger amounts into applications over several months.
Organic Amendments for Long-Term pH Management
Best Practice: The application of amendments to the top 6 to 12 inches of the soil is best in the most common case before the planting. Once the amounts have been spread out for observation at the treatment site, mix the material carefully with the soil by use of rakes or tillers. An even distribution produces uniform pH changes in root zone. Without incorporation, surface applications don’t succeed because amendments need to hit soil particles to trigger action in soil particles.
Compost and Organic Matter
The pH of garden soil will drop with time, thanks to well-decomposed compost[8]. The correct long-term approach to amend soil, however, is to do so with compost high in organic matter each season, as it will change slowly and bring in several benefits to the root. Compost also strengthens the structure of soil and attracts beneficial micro-organisms in its soil. Compost also has a gradual pH reduction from soil relative to only sulfur or aluminum sulfate for sustainable levels of improvement.
Peat Moss Applications
Planting in peat moss helps slowly lowering pH in garden soil[8]. The maximum functioning of Canadian sphagnum peat moss occurs at pH 3.0–4.5[7]. In garden centers, most peat moss sold on clearance has rates of neutral to slightly acidic rates and minimal pH variability. First apply one to two-inch layers of Canadian sphagnum peat moss and lay it over the top six to twelve inches before planting. Test pH after use to check that progression closer to target values is confirmed.
Fertilizers and Mulches
The addition of particular fertilizers such as nitrogen sources containing ammonium that will keep the soil acid can help to maintain this stability, such as ammonium-containing nitrogen sources like ammonium sulfate[6]. These fertilizers are likely to fail as remedies by themselves to diminish a soil’s pH. The product mixture ammonium will then react in the soil to contribute towards the stabilization of an initial acidification of the soil in reaction with sulfur or aluminum sulfate. Ammonium sulfate plays a role in commercial growers’ naturally high-pH soil for an annual safeguard for maintaining soil in preferred pH range for commercial growers[7].
A decrease in pH from such mulching with pine needles or oak leaves is known to increase acidity when materials degrade[8]. These types of organic mulches encourage gardens by decreasing soil erosion and increase retention of water whilst maintaining the temperature, moisture and nutrient concentrations. Peat moss and the presence of some organic compartments of matter is a good source of organic carbon for changing soil pH[6]. But these organic compounds occur slow and do not always result in big pH changes by themselves. Best use with sulfur applications.
Coffee grounds break down to acidify soil gradually while adding nitrogen and organic matter.
Coffee grounds corrode soil to acidify the soil[8]. If available, save the ground coffee grounds from the morning coffee and put them between the garden beds, or put in compost piles. With the slow breakdown of materials, the process is called an acidifying effect. In addition, coffee grounds have nitrogen and organic matter added to soil.
Maintaining Optimal Soil pH Over Time
Owing to the normal return of soils to the original pHs that we observe around us, preserving appropriate acidity continues to be a matter of concern. The underlying basis for soil pH is its parent material[5]. Soils formed by basic rocks tend to have a higher pH value than soils formed by acid rocks. Soil is also leached with water from basic nutrients like calcium, magnesium[5]. Aluminum and iron replaces water as acidic elements. In soil development a person’s long-term pH preference will be affected by how much rain it receives.
Fertilizers containing ammonium or urea accelerate the rate of acidity formation[5]. The degradation of organic matter also increases soil acidity through hydrogen ions production. Knowledge of such influences on soils enables predicting the speed with which soil will transition away from desired pH after amendments.
Regular Testing Schedule
Test garden soil periodically, in order to determine its level of pH[8]. Keep everything correct if it shows drift outside of the preferred range of high 5’s to low 6’s by astilbe. Think about what water source nourishes the garden. The most sustainable approach is to collect natural rainwater in barrels or containers that mimic nature best. Hard water from garden hoses carries a high pH and results in changing soil over time with the increase in pH[8].
pH values must therefore be adjusted according to the soil and thus different amounts of amendments are needed in varied amounts. Textile topography, soil organics content and plant types are taken into adjustment calculations. The same pH adjustments are made in less clay-rich soils. Buffer pH measurements (from industry soil tests) offer the most accurate basis for measuring amendment requirements.
When pH Cannot Be Changed
Soil pH less than 7.5 can be amended successfully[6]. If the pH of the soil is more than 7.5 adding any amendments likely will not have significant effect on reducing the pH as free calcium carbonate will be present. But in certain areas, this unhappy state of affairs spills over into the soils. In these areas, rather than combating natural soils’ chemistry, instead, you may want to plant plant species more tolerant of high pH conditions.
Finer the limestone particles, the more quickly amendments succeed[5]. The same principle applies for sulfur products – fine particles are much bigger than coarse particles. Elemental sulfur reacts more quickly than coarse aggregates because increased area on the surface of rocks (that is to say soil layer coverage) interacts with moisture and bacteria. When rapid results are important for established plantings, buy the best grade you can get.
Troubleshooting pH-Related Problems
Overall, lessing pH of soil prior to planting sensitive landscape ornamentals is more effective than attempts to ameliorate with establishment[6]. When developing shade gardens with astilbe, plan ahead. Test soil in proposed planting areas for fall. Make the necessary pH adjustments in winter and early spring. Pre-purchase, try again on a retest for readiness. This methodical approach avoids disappointing results where the plants were stressed by wrong pH.
For settled astilbe suffering from symptoms of high pH like the yellow appearance of leaves starting to leave, the aluminum sulfate to be applied monthly top-dress on one pound every plant is necessary[6]. Lightly scrap soil without damaging shallow roots. Water carefully per application. Watch the reaction of plants throughout the growing season. The less yellowing and better life span indicate successful pH reduction. Retest soil the following spring for checking if pH has moved into the right range of the desired range.
Nutrient Availability and pH
Soil pH influences nutrient availability for astilbe plants[7]. A pH above 6.5 or above means some degree of phosphorus and the majority of the micronutrients are less readily available for plant uptake. Iron, manganese and zinc increase in availability with decreasing pH. Molybdenum, on the other hand, appears to have the opposite pattern, decreasing in availability in acidic environments. Nutrient availability is optimal for astilbe’s optimal pH which is in the high 5’s to low 6’s.
We know that lime-soil and sulfur-soil reactions require moisture[5]. Not even well-grounded amendments affect pH if soil is still dry. Add amendments to soil after application and keep soil moist and moist during the reaction time. This need fits nicely with astilbe’s need for moist soil over the length of the growing season.
Since the scale is logarithmic[7], doubling sulfur or lime will not doubled soil pH. Because of this non-linear nature of the pH curves, larger pH corrections necessitate disproportionately more amendment than minor ones. Transitioning pH from 7.5 to 6.5 requires far more material than reducing it from 6.5 to 6.0. Consult rate tables with soil tests and not estimation of how much should be added through the process.
Conclusion
To manage Astilbe soil pH there is an understanding of acceptable limits, accurate testing, suitable additions, and application methods for patients. The success of the project depends on your ability to test before making amendments, selecting suitable materials for the time that you need to do it, using the necessary additional filters appropriately, and the maintainability of the pH over a period of time, period. Proper control of pH in the soil in the ranges of high 5’s and low 6’s provides maximum nutrient availability, makes for abundant plantings, and allows for vigorous growth season on season.
Key Sources:
[1] How to Grow Awesome Astilbe | Espoma Organic
[2] How to Grow Astilbe | American Meadows
[3] How to Grow and Care for Astilbe | The Spruce
[4] How to Test Soil pH With and Without a Kit | The Spruce
[5] Changing the pH of Your Soil | Clemson HGIC
[6] Reducing Soil pH | Wisconsin Horticulture
[7] How To Change Your Soil’s pH | Iowa State Extension
[8] Making Soil More Acidic Organically | Kellogg Garden
Lily Morgan is a home gardener. She grows houseplants and designs small-space gardens. She shares what she learns from experience. Lily offers simple, practical tips for plant lovers. Her goal is to help others garden with confidence. She wants to help them grow, one leaf at a time.