Spring Astilbe Care: Early Season Tasks & Maintenance
Your astilbe emerges from dormancy when spring temperatures warm the soil, signaling the start of critical maintenance tasks. Established clumps that receive proper spring care produce vigorous foliage and abundant flower plumes throughout the growing season. Neglected plants develop weak stems, sparse blooms, and declining health that compounds over multiple years[1]. Spring presents the optimal window for dividing overcrowded clumps, applying fertilizer, and establishing new plants before summer heat arrives.
When to Begin Spring Astilbe Care
Spring astilbe care starts as soon as new growth is seen and the soil is workable. The timing is location-dependent, but it generally comes about when daytime temperatures settle repeatedly in the mid-40s to 50s. Early intervention prevents harm to shoots developing and optimizes the growing season.
Cutting Back Old Foliage
Cutting back old foliage is one of the first spring tasks done by astilbe workers. Remove all dried flower stalks and dead leaves from the previous season by cutting plants to ground level[2]. This clean up also removes overwintering disease spores and insect eggs, and leaves the crown more convenient for other maintenance work.
Clean, sharp pruning shears should make cuts flush with the soil surface and without destroying emerging shoots. Removing plant material should be correctly disposed of, instead of composted, if symptoms of the disease appeared the previous year. Healthy dried foliage can be added to compost piles to break down and return nutrients to the garden.
This cleanup should be done before new growth has exceeded the mark of more than an inch or two in height so as not to accidentally cut off fresh shoots.
Dividing Astilbe Clumps
Dividing the astilbe maintains plant vitality and prevents overcrowding from being an obstacle to flowering. Astilbe clumps must be divided every three to four years in early spring as new growth begins[1]. This timing enables divided sections to grow roots before summer heat stress sets in. Crowded plants produce woody centers with poor bloom production and a low quality of foliage during the summertime.
Division Process Steps
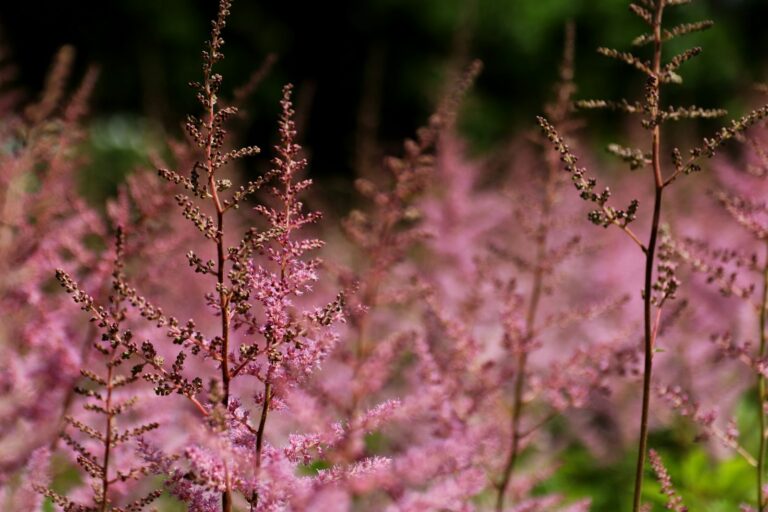
The division mechanism begins by digging up the whole root clump a few inches away from the visible plant, in order to prevent roots from being destroyed. As can be seen from the image above — just lift the clump from soil with as much of the root ball as you can with a sharp spade.
Astilbe grows on the thick, fleshy roots, and the use of a sharp knife or sharp spade blade is necessary to cut through such heavy roots evenly[1].
Split each clump into 3 or 4 sections, each division containing at least 1 eye or growth point[1]. Smaller divisions may not be able to establish and produce weak plants quickly. Divisions that have multiple eyes create and grow faster than minimal divisions. Inspect the roots during division, remove dead or diseased portions, and make clean cuts.
Replanting Divided Sections
Divisions should be replanted immediately at the same depth as the original plant. Place new plants at least 16 inches apart for the spreading spread of foliage[1]. After planting, water properly and spread mulch after planting to help keep the moisture when it is first established.
Divisions may show temporary stress with some browning of leaves, but with time and regular water, divisions should recover soon.
Spring Planting New Astilbe
Fresh astilbe planting in the spring should be done after the severe freeze has passed but before summer heat arrives[3]. Container-grown plants are able to thrive when spring is planting season if the site is well prepared and with regular water. Select a place with part shade to full shade, astilbe thrives off the protection from a bright afternoon sun[2].
Site Preparation
Prepare 8 inch deep planting holes that are as wide as the root ball[7]. Soil preparation is the key to successful plants and struggling specimens. Astilbe needs moist and well-drained soil rich in organic material[1].
Before planting, amend heavy clay soil with compost, peat moss, or other organic matter to improve drainage and fertility[8].
Then place the crown of the plant about 1 inch below the soil surface, spreading out the root system to encourage new root development[1]. Planting too deep can cause crown rot, and planting too shallow can cause roots to dry and vary in temperature. Backfill with amended soil; fill gently so that air pockets are removed and gently firm; and water deeply to settle the soil around the roots.
Fertilizing for Vigorous Growth
In spring, fertilizing astilbe gives nutrients for vigorous growth and blooming. Apply fertilizer by early spring, when the plants develop and soil becomes moist[3]. Slow-release granular fertilizer is also suitable for astilbe which slowly adds nutrients to the plant throughout the growing season[6].
Nutrient-balanced products, or those with a slightly higher phosphorus level, encourage healthy root development and blossoms. Astilbe is an example of a heavy feeder that benefits from abundant fertilization[6]. If it is necessary to measure the application rate, use the fertilizer as recommended on the package label. When it is advised, use an extra fertilizer, applied at half the recommended rate, to achieve the desired results[6].
Application Methods
Push aside any mulch, then apply granular fertilizer, then gently rake into the soil. When fertilizer application is timed with active growth, nutrients are reached at the exact times plants need them most.
Early-season blooming varieties produce flower buds in autumn for spring display, making a spring fertilizer a key nutrient used for bloom preparation[1]. Offering a second fertilization in fall helps early bloomers but spring is the preferred feeding season for all forms of astilbe[6].
Mulching to Conserve Moisture
Mulching astilbe in spring preserves soil moisture and decreases weed competition. Lay a layer of 1 to 2 inches thick organic mulch such as shredded bark, leaf mold or compost in the vicinity surrounding plants[4]. Mulch preserves the uniform moist soil conditions astilbe needs and acts as a tonic to any soil temperature swings.
Keep mulch several inches away from crowns to avoid crown rot (moisture formation). Extend the mulch outward to cover the root zone, which is as wide as the foliage canopy. Organic mulch decomposes slowly throughout the season, thereby providing nutrients and aiding soil structure[4].
Refresh mulch layers each spring so that they become deeper after winter settle and decay.
When mulch is applied to the soil more than 3 inches, it will trap a lot of moisture that makes the soil fertile for fungal diseases. Investigate mulch depth during the growing season, apply additional mulch as necessary, as appropriate, in the event that soil is exposed or the pressure from weeds increases.
Watering During Establishment
Astilbe is grown during the establishment period[4]. Deep watering of the astilbe is also recommended at least once a week during the establishment period. Daily water newly planted or divided astilbe (i.e., placed at the bottom of a bed) for the first two weeks for root development, then add less frequent but deeper watering as the roots develop. This ensures that astilbe becomes attached in a natural, continuous way during early soil-growing period.
Application of water at the base of the plant rather than overhead helps keep foliage dry and reduce the risk for disease. Water used is also brought back to root zones via soaker hoses and/or drip irrigation without wastage. Established astilbe tolerate short periods of drought more than newly planted astilbe, while all astilbe do poorly by prolonged drought.
Monitoring Soil Moisture
Note soil moisture if you feel the soil a few inches below the surface. If soil is dry at this depth, water deep enough for moisture to penetrate 6 to 8 inches down. Shallow often over watering promotes shallow root systems that leave plants prone to drought stress.
Deep and less frequent watering promotes drought resilience because it deepens root growth.
Soil Preparation and Testing
Soil moisture for the spring planting will have an effect on the plant long term. Try to test for pH when planting, astilbe will be less acidic to neutral and this is around 6.0[4]. Use amendments according to the soil type, if necessary, in order to adjust the pH of the soil. Soils unsuited for alkaline soil can be enriched with the use of elemental sulfur or acidic organic matter.
Deeply work organic matter in planting areas to refine soil structure, water retention and moisture levels. Dig amendments into the upper 8-12 inches rather than simply pouring into backfill soil. This establishes a phase of transition that promotes rooting into the native soil beyond the planting hole to reach to a root and creates a transition zone.
Drainage Assessment
Assess drainage before planting astilbe in low-lying areas. Astilbe requires constant moisture but lacks the tolerance of damp or overburdened soils, which suffocate roots[8]. Enhance drainage in areas with problems by increasing planting beds, laying out drainage tiles, and/or planting in other regions with improved natural drainage.
Conclusion
Spring care establishes a basis for astilbe to function well during the growing season. Proper spring care (cleaning, dividing if needed, fertilizing and maintaining the soil in the right quantities of moisture) leads to beautiful plants with large amounts of foliage, along with beautiful flower displays. The effort needed for earlier season jobs is met in later maintenance time and well-growing plants over years. Take care of spring astilbe once new growth develops and soil conditions permit it, and finalize key activities before plants begin actively growing and flowering.
Key Sources:
[1] Growing Astilbe – How to Grow & Care for Astilbe Plants | Garden Design
[2] Caring for Astilbe: Cutting Back and Dividing for Healthier Growth | Native Wildflowers
[3] How to Grow and Care for Astilbe | The Spruce
[4] How to Grow Astilbe | American Meadows
[6] When and How to Fertilize Astilbe | Gardener’s Path
[7] Dividing Astilbe Plants: How To Transplant Astilbe In The Garden | Gardening Know How
[8] Growing Astilbe in Iowa | Iowa State Extension
Lily Morgan is a home gardener. She grows houseplants and designs small-space gardens. She shares what she learns from experience. Lily offers simple, practical tips for plant lovers. Her goal is to help others garden with confidence. She wants to help them grow, one leaf at a time.